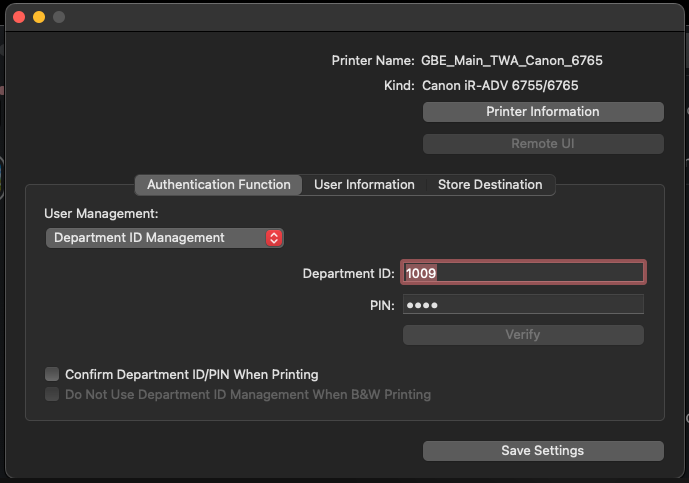
MacOS - Set Up Dept ID

Last updated: Oct 12, 2026
7
views

***The following settings can only be applied once the Canon/s have been set up with Dept ID. See this article for those initial steps: How to Set Up Dept ID for Canons
For a more in-depth walk through and set up, see the Mac Print Guide shortcut on your Mac's desktop.
- Open System Preferences.
- Click on Printers & Scanners.
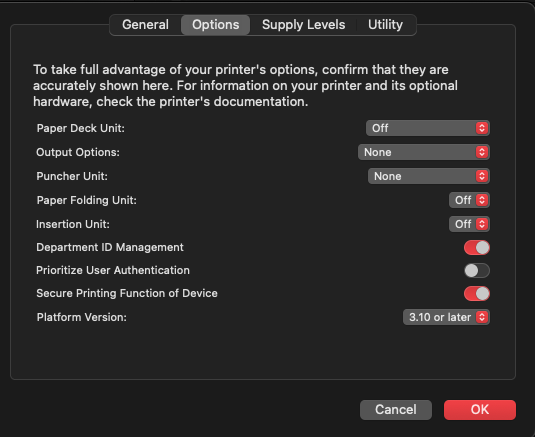
- Select Options and Supplies…
- Select the Options tab at the top of the window.
- Verify Department ID Management and Secure Printing Function of Device is checked.
- Select the Utility tab at the top of the window.
- Select Open Printer Utility.
- In the dropdown for User Management, select Use Department ID Management.
- Enter the four digit Department ID (provided by your supervisor). The Pin is the same as the Dept ID.
- Select Save Settings.