Windows - Set Up Dept ID

Last updated: Oct 12, 2026
8
views

***The following settings can only be applied once the Canon/s have been set up with Dept ID. See this article for those initial steps: How to Set Up Dept ID for Canons
1Click [ ] (Start)
  [
[ ] (Settings)
  [Devices]
  [Printers & scanners].
2Click the driver of the machine  [Manage]
  [Printer properties].
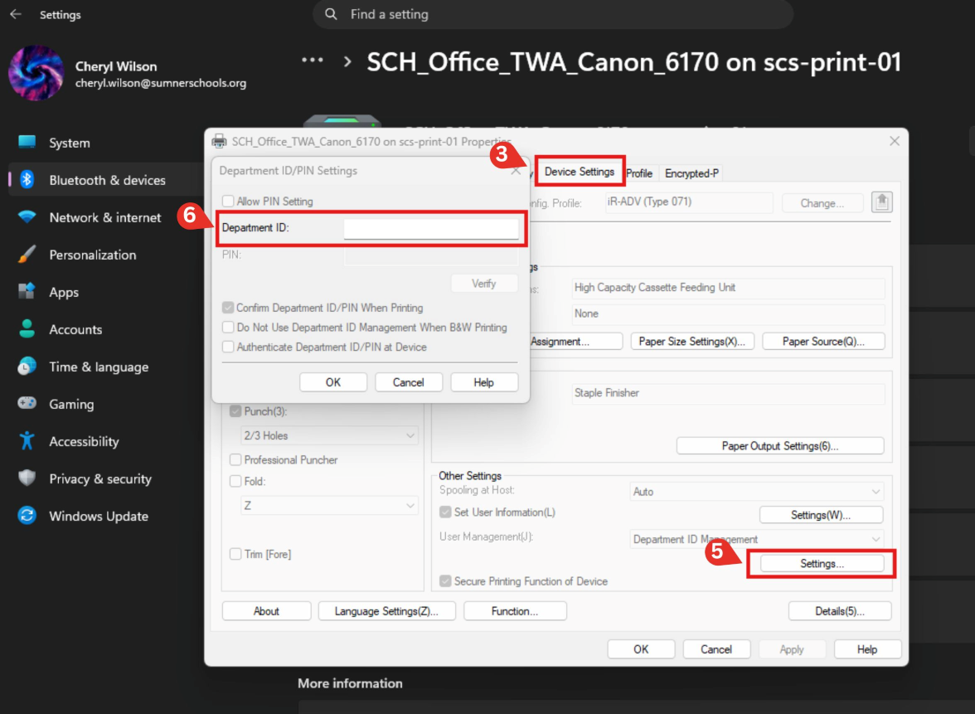
3 On the [Device Settings] tab, set [User Management] to [Department ID Management].
5 Click [Settings] at the bottom right. The [Department ID/PIN Settings] screen is displayed.
6 Set the Department ID and PIN.
To set a PIN, select the [Allow PIN Settings] checkbox, and enter a PIN.