Security Camera Set Up for iPad

May 10, 2022
 1466
1466
This is an iPad-specific tutorial. This will help principals, assistant principals, and SROs get their school security cameras running on an IOS device that is enrolled in Mosyle.
Notes:
- Lead educators have not been approved to use this system.
- As of this moment ( 5/9/22 @ 1:28pm ), I am not sure if/how playback and footage downloading features work as they do on a PC - caveat emptor.
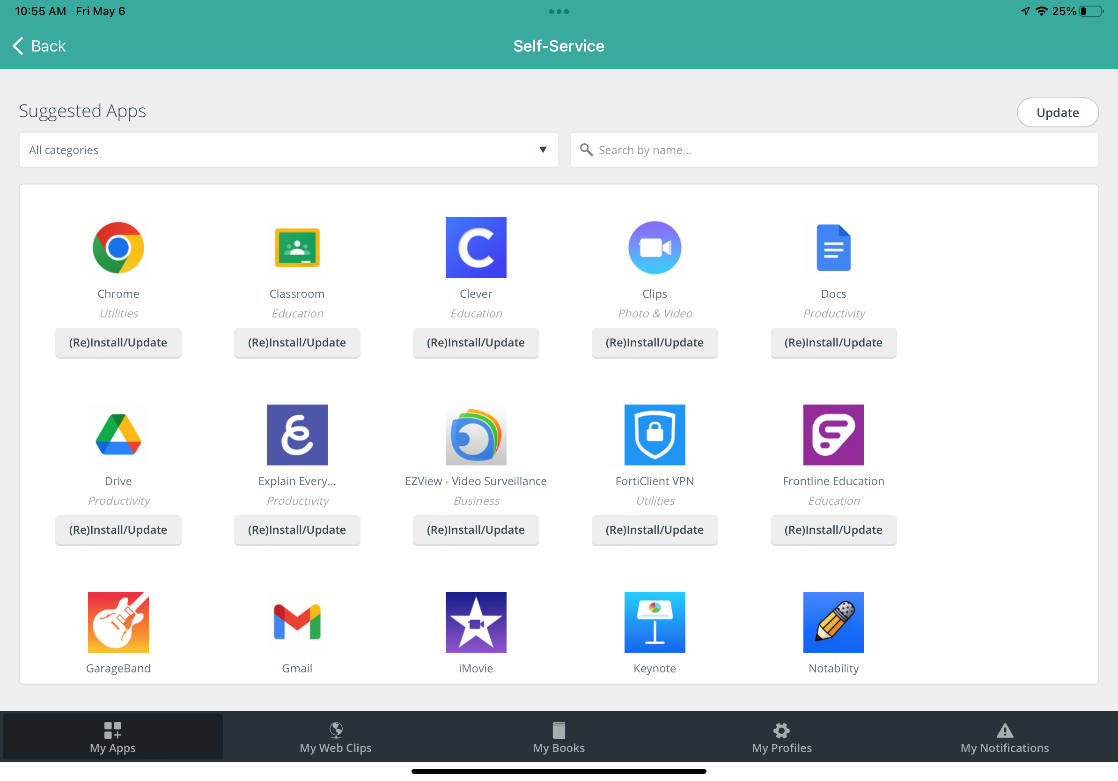
- Find the Manager App on the home screen and launch it.

- Tap the Self Service button to log in.

- If this is the first time they have used Manager, agree and/or choose the first-time aggravating options that pop up.


- Locate the EZView app and tap to download it to the device.
- Exit out of Manager and locate the EZview app icon on the home screen. It may take a minute to download. It will show the progress on the icon. Tap to launch.

- Check the “I have read and agree to” box and then tap the agree button.

- Swipe past the info boxes


- Tap the “x” on the pop-up window then, close the entire app. To do this, swipe up from the bottom of the screen, then swipe the app off of the screen.

- Relaunching the EZView app from the home screen will bring you to this screen. Tap the 3 line menu on the top left and select “Devices” from the fly-out menu


- Select “+Add” from the bar

- Select “Manual Add” from the menu

- Fill out the fields with the schools’ information:
Name: ( School Name NVR )
Address 10.(## or ###).129.10 (refer to security camera spreadsheet)
Port: 80
Username: user1
Password: Refer to the security camera spreadsheet
Streaming Media Profile: Default
Live View: Auto
Playback: Low
When complete, tap the save floppy disk icon in the top right.

- Select the 3-line menu again and select Live view. If all the information entered is correct, the cameras should appear.


